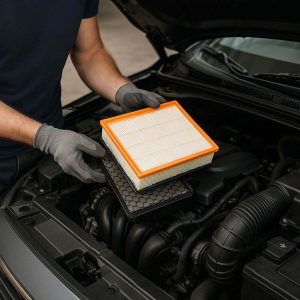
Replacing your car filters — whether it’s the air filter, cabin air filter, oil filter, or fuel filter — is one of the most cost-effective and straightforward ways to maintain your vehicle. Many car owners choose to do it themselves to save time and money. However, even simple jobs can go wrong if you’re not careful. In this article, we’ll break down the top 7 most common DIY car filter replacement mistakes and show you how to avoid them.
Whether you’re a first-time DIYer or an experienced home mechanic, avoiding these pitfalls can help you keep your car running smoothly and prevent costly repairs down the road.
Top 7 DIY Car Filter Replacement Mistakes
1. Choosing the Wrong Filter
Mistake: Selecting a filter that doesn’t match your car’s make, model, or engine type.
Consequence: Poor fit can lead to unfiltered air, oil, or fuel entering the engine or cabin, reducing performance or causing damage.
How to Avoid:
-
Always check your vehicle’s manual or use an online parts catalog.
-
Stick to trusted brands and certified parts.
-
Use a reliable online source like Buy Car Filters online to ensure compatibility.
2. Forgetting to Check Filter Orientation
Mistake: Installing the filter backwards or upside down.
Consequence: Reduced filtration efficiency and possible airflow obstruction.
How to Avoid:
-
Look for directional arrows on the filter showing airflow.
-
Review installation diagrams or how-to videos specific to your car model.
3. Ignoring the Housing Seal or Gasket
Mistake: Reusing a worn gasket or not sealing the filter housing properly.
Consequence: Leaks in oil, air, or fuel systems, which can lead to engine problems.
How to Avoid:
-
Always replace the rubber gasket or seal if included.
-
Ensure the housing is tightened evenly and completely.
4. Skipping Pre-Cleaning of the Filter Area
Mistake: Installing a new filter in a dirty compartment without cleaning it first.
Consequence: Debris can be pushed into the system, reducing the new filter’s life.
How to Avoid:
-
Wipe the filter housing or compartment with a clean cloth.
-
Use a handheld vacuum or compressed air to remove loose dust or debris.
5. Over-Tightening the Filter Cap or Housing
Mistake: Applying too much force when securing the filter housing.
Consequence: Can crack plastic housings, damage threads, or crush the filter.
How to Avoid:
-
Use a torque wrench when specified by the manufacturer.
-
Tighten just until snug — don’t force it beyond the recommended point.
6. Not Resetting System Alerts or Maintenance Reminders
Mistake: Forgetting to reset the maintenance light or onboard system alerts.
Consequence: Continued alerts may confuse future service checks or cause unnecessary worry.
How to Avoid:
-
Check your owner’s manual for reset procedures (many cars have a simple button sequence).
-
Reset oil change reminders or cabin filter alerts after replacement.
7. Neglecting a Visual Inspection After Installation
Mistake: Replacing the filter and immediately closing the hood or panel without checking.
Consequence: A misaligned filter or improperly sealed housing could go unnoticed, leading to performance issues.
How to Avoid:
-
Run the engine or fan briefly and check for noise, vibration, or leaks.
-
Recheck alignment and fitment before finishing the job.
Quick Reference Table: Mistakes vs. Solutions
| DIY Mistake | Potential Problem | How to Prevent It |
|---|---|---|
| Using the wrong filter | Poor fit, leaks, damage | Verify compatibility before purchase |
| Incorrect orientation | Reduced efficiency, blockages | Follow airflow arrows or manual instructions |
| Ignoring gaskets/seals | Leaks, contamination | Replace all seals and tighten evenly |
| No pre-cleaning | Shortens filter lifespan | Clean the compartment before installation |
| Over-tightening | Cracks or thread damage | Use proper torque or hand-tighten carefully |
| Not resetting alerts | Confusing maintenance reminders | Reset system after replacement |
| Skipping post-install check | Missed installation issues | Run a test and inspect the area |
Bonus Tips for First-Time DIYers
-
Watch tutorial videos for your specific vehicle model.
-
Wear gloves to avoid skin contact with oil or dirty filters.
-
Dispose of old filters properly — oil and fuel filters must go to recycling centers.
-
Keep a log of when and what filters you replaced to stay on schedule.
Recommended Tools for DIY Filter Replacement
| Tool | Purpose |
|---|---|
| Screwdrivers | To access filter compartments |
| Socket set or wrench | For oil and fuel filters |
| Torque wrench | Ensures proper tightening |
| Vacuum/compressed air | Cleans out compartments before install |
| Gloves and rags | Keeps your hands clean and area tidy |
Where to Get Quality Filters
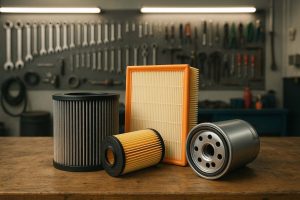
Choosing quality replacement parts is key to avoiding most of the mistakes listed above. Cheap, low-grade filters may not fit properly or fail prematurely.
Shop filters from trusted brands like:
-
MANN-FILTER
-
Bosch
-
MAHLE
-
Filtron
-
Hengst
You can browse reliable options for your car model at Buy Car Filters online, where you’ll find great deals and fast delivery across Europe.
Final Thoughts
DIY car filter replacement is a smart and practical way to extend your car’s lifespan and save money. However, a few avoidable mistakes can turn a simple job into a costly problem. Always take your time, follow manufacturer guidelines, and double-check your work.
With the right approach — and the right filters — you’ll enjoy better performance, cleaner air, and peace of mind behind the wheel.
Ready to get started? Buy Car Filters online for high-quality replacements that fit your vehicle and your budget.